Surrey Barn Conversion: Full Bathroom Fit-Out
Full strip-out, structural reinforcement, waterproofing and tiling for a bathroom in a barn conversion in Surrey, finished in white metro tiles, patterned floor tiles and black trim throughout
What the Walls Were Hiding
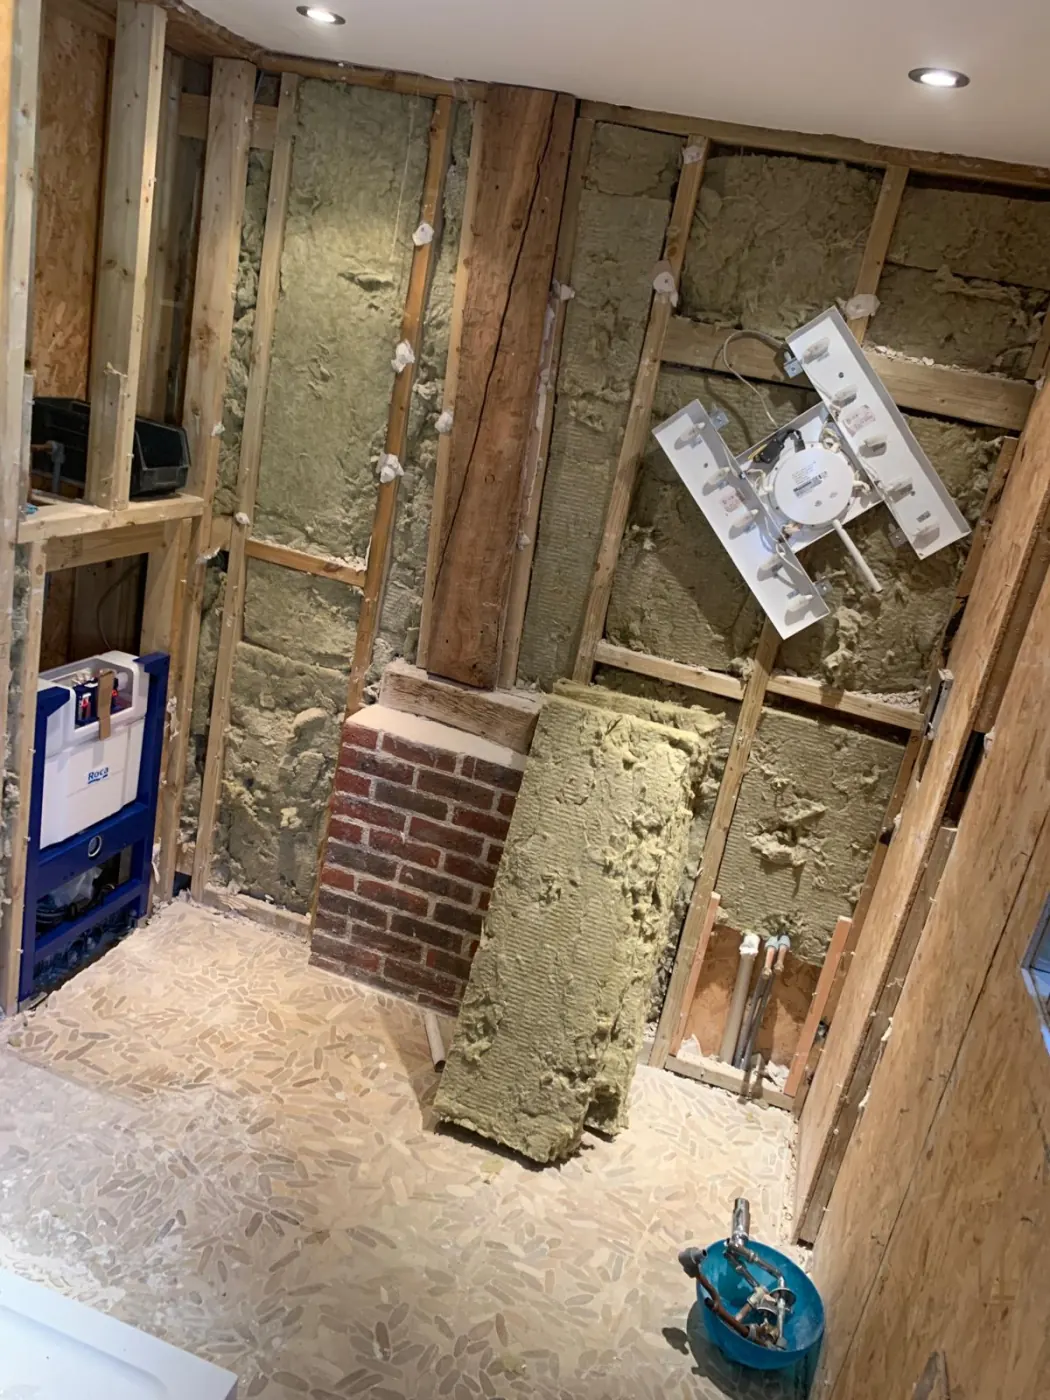
The before images show the job as it looked before a tile went anywhere near it. The room was stripped entirely, floor, walls and wall boards all removed down to the structural frame. In a barn conversion, what you find behind the walls is rarely what you expect and this one was no different. An original brick plinth was exposed within the structure, old insulation was stripped out and replaced with Celotex throughout, and both the timber stud walls and the floor needed structural reinforcement before they could carry a tiled bathroom. You cannot tile over a structure that is not up to the job. The reinforcement work had to come first.
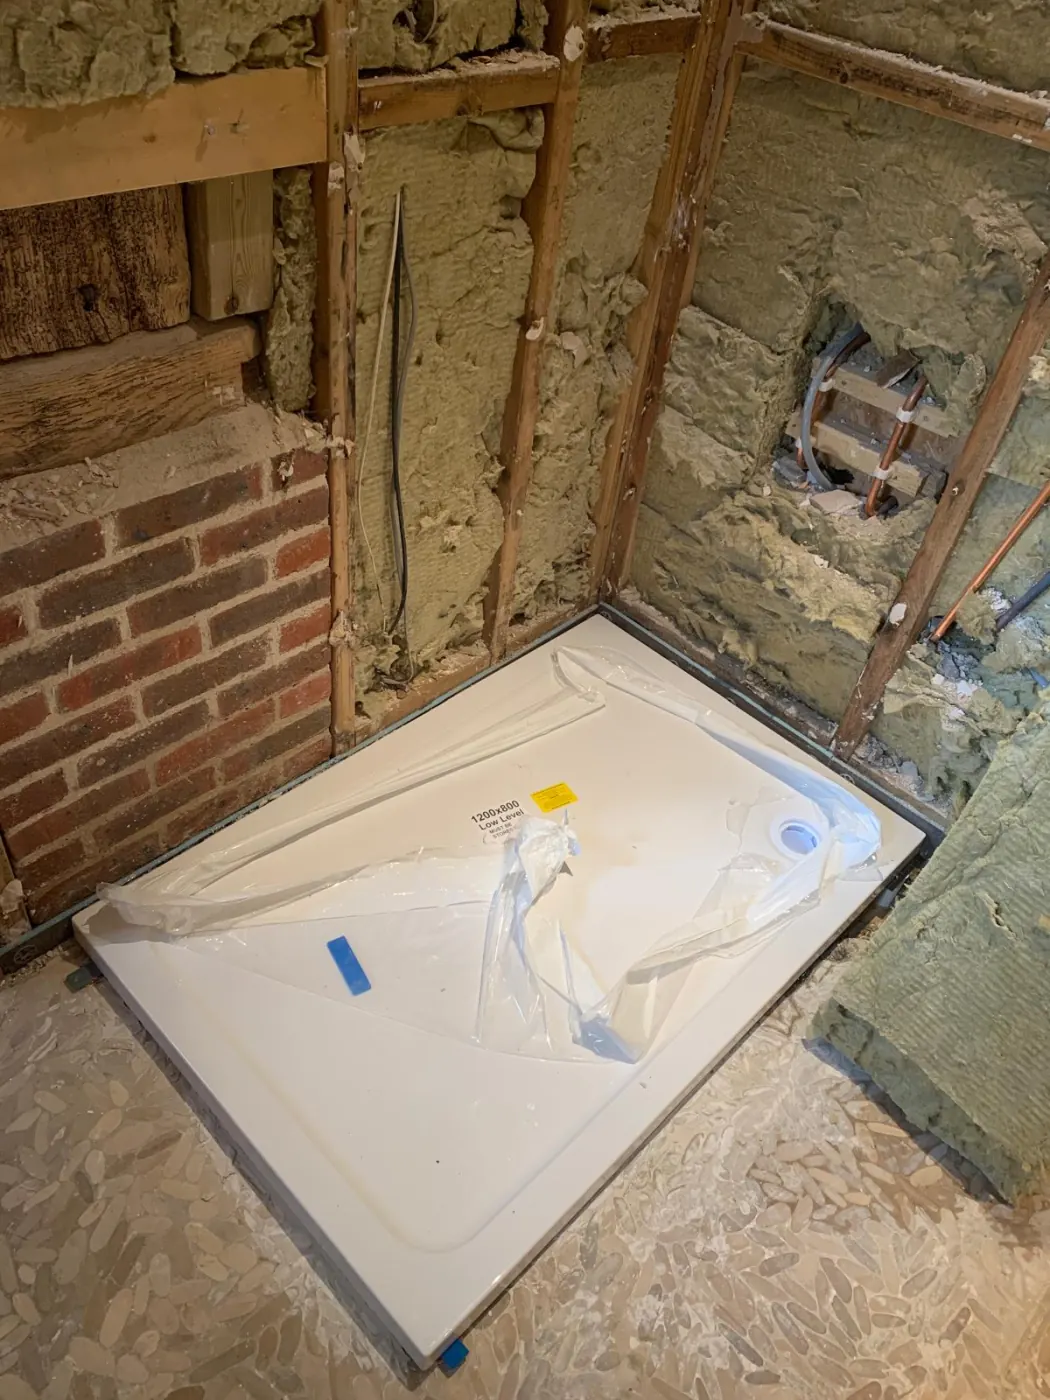
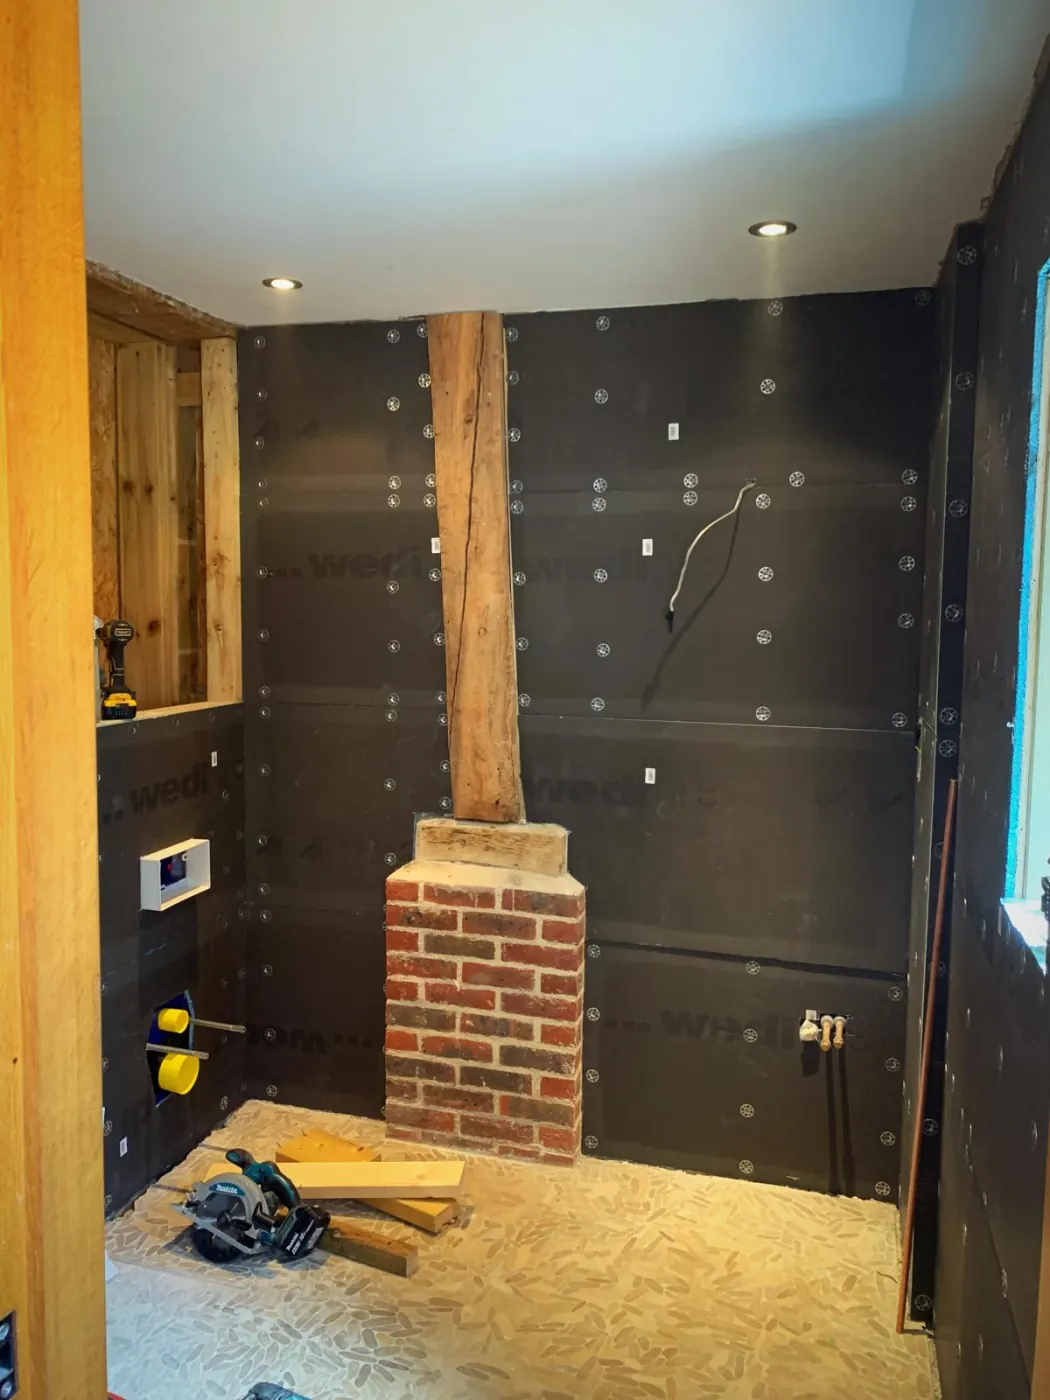
Once the structure was sound, waterproofing boards were installed throughout the walls and floor to give the tiling a stable, moisture-resistant substrate from every angle. A new shower tray was set at this stage too, before the tiling programme began. The before images make clear how much work sits behind the finished room. Strip-out, reinforcement, new insulation, waterproofing, shower tray, all of it resolved before the first tile was laid. That is three weeks well spent before you even consider what goes on the walls.
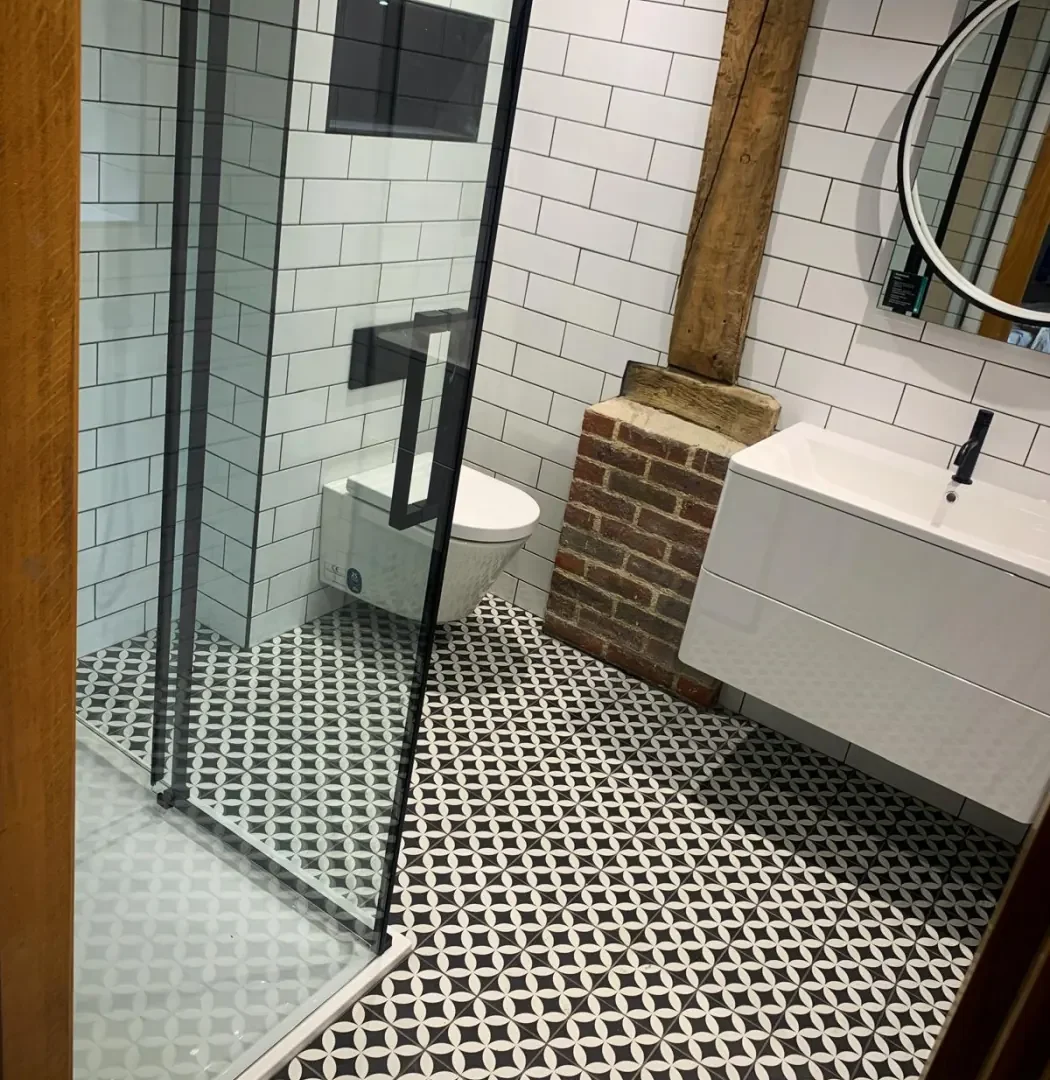
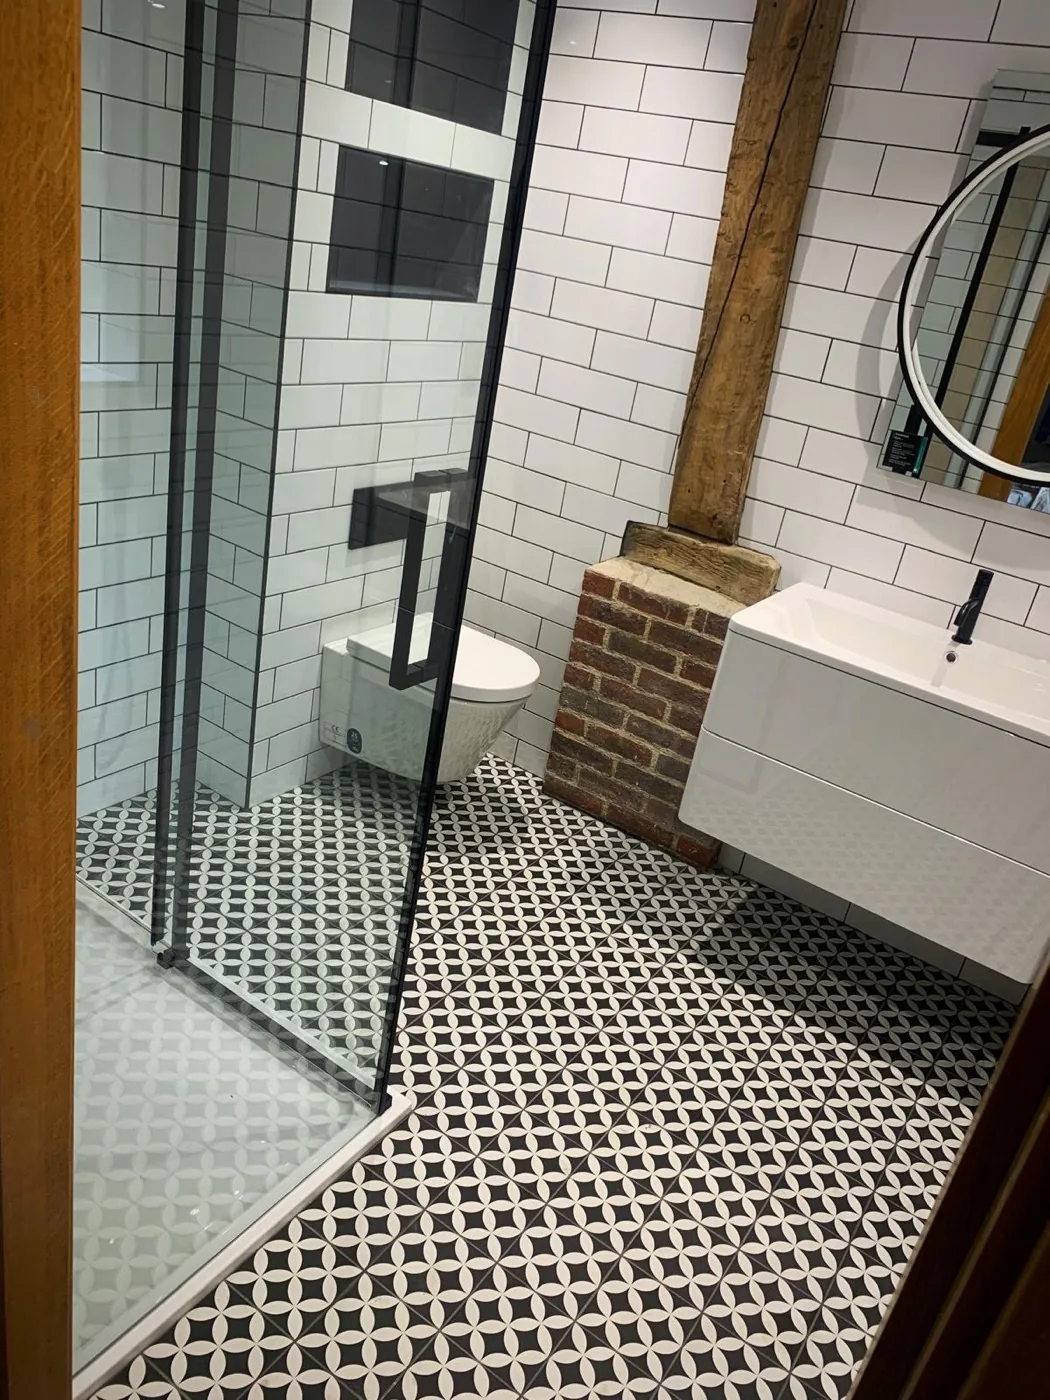
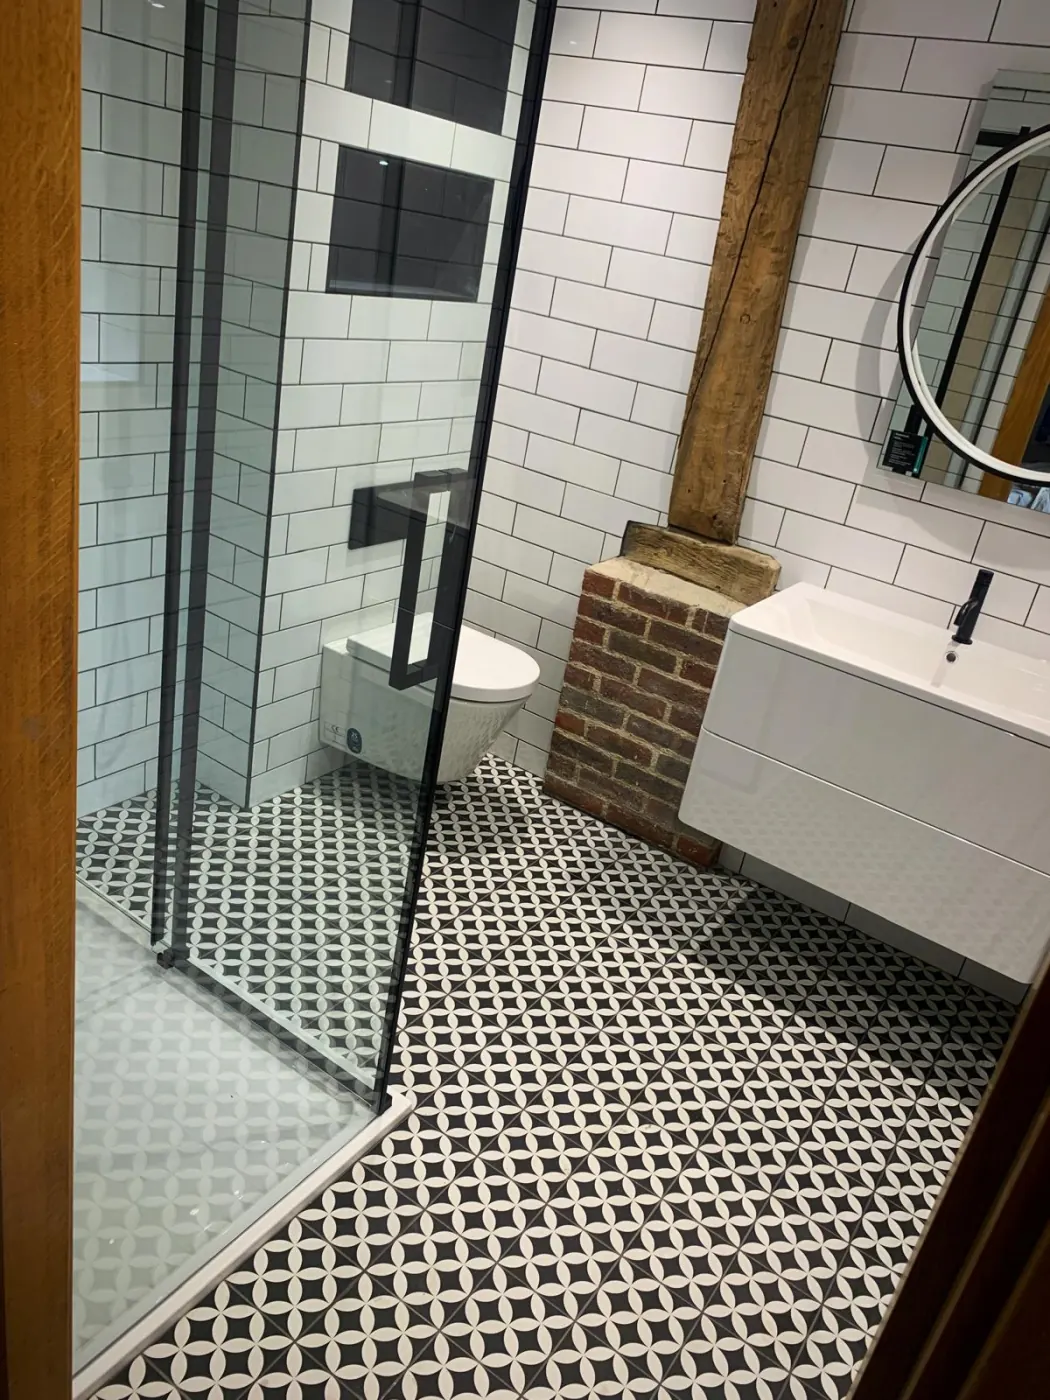
Clean Lines, Considered Details, Right for the Building
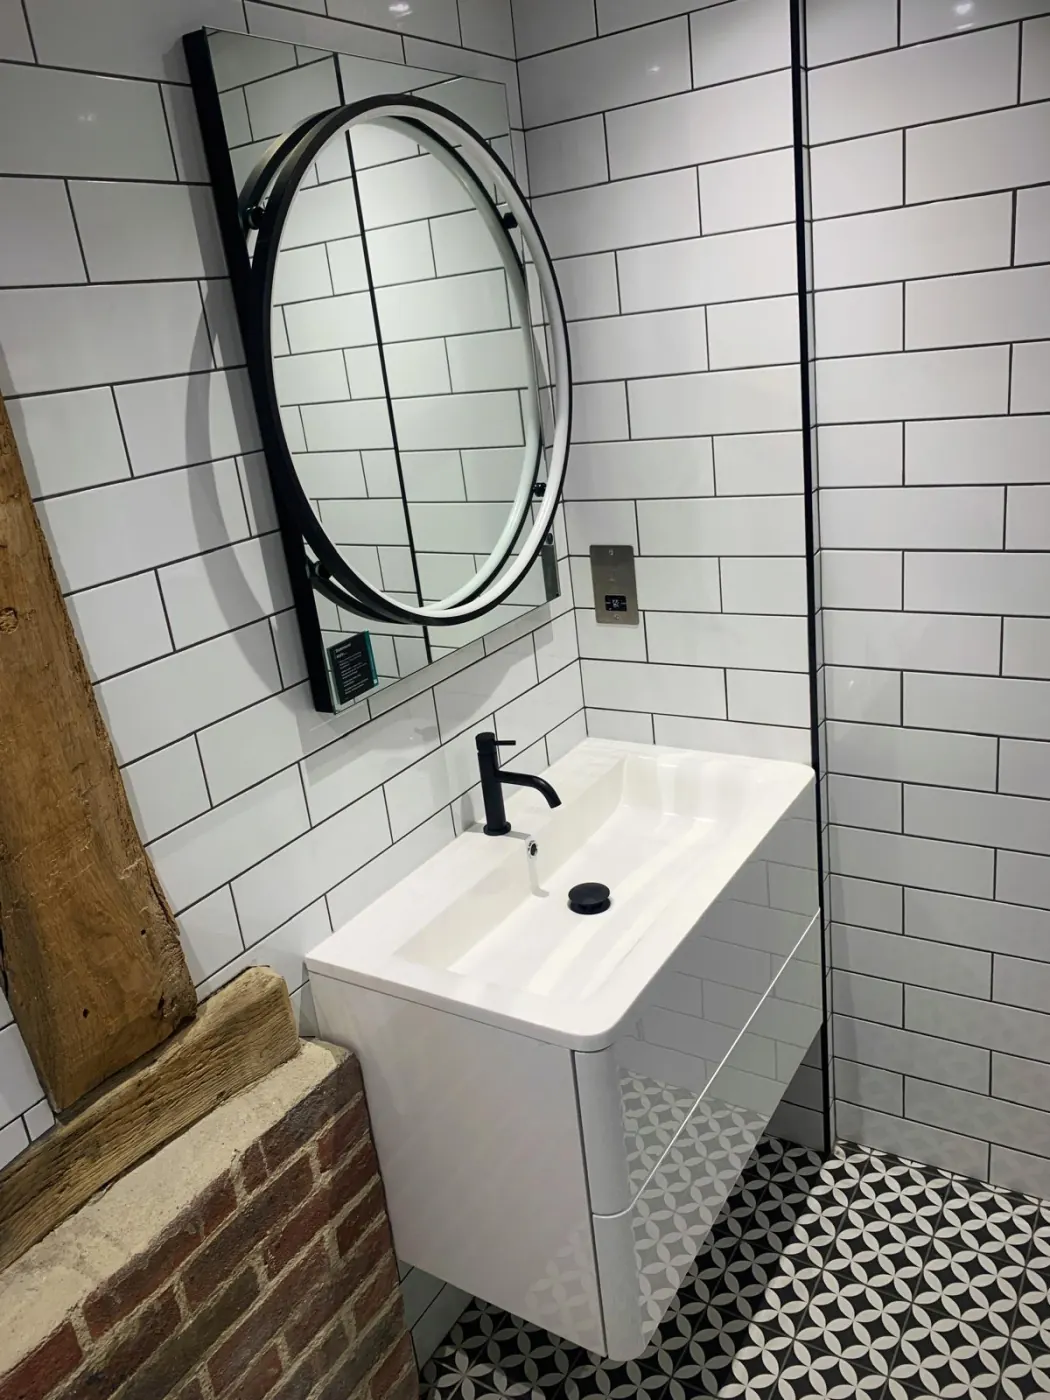
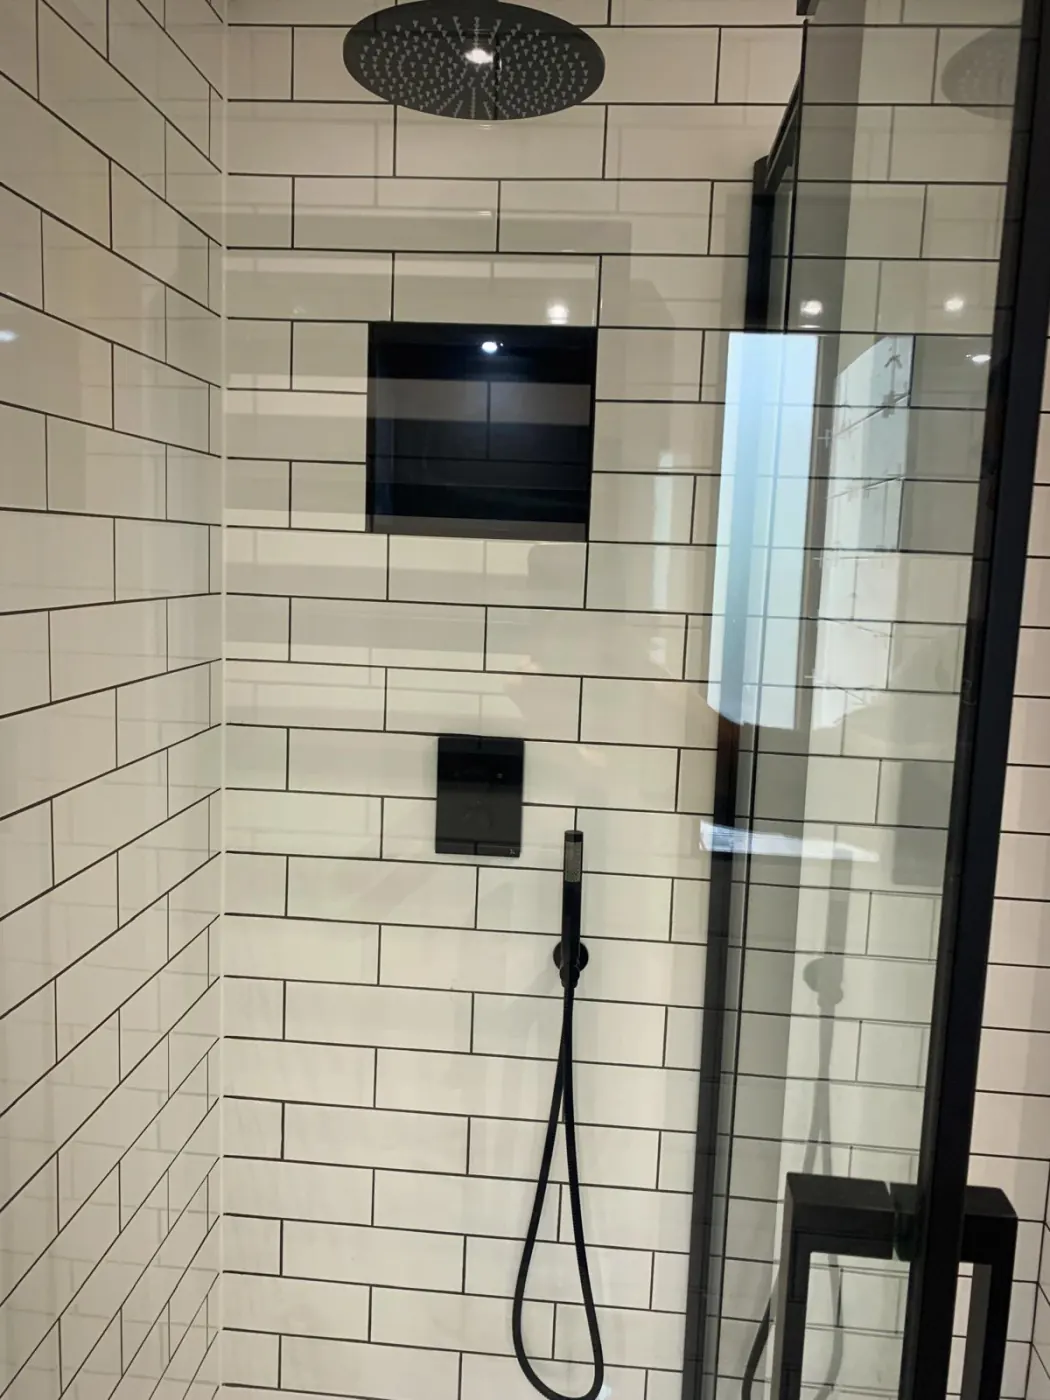
The wall tiles are white metro at 100 x 300mm, laid in a brick bond pattern and grouted in black throughout. The floor tiles are a 200 x 200mm patterned design in black and white, giving the floor its own character without competing with the clean lines of the metro walls. The details that needed the most care in the setting out were the recessed niches. There are two in this bathroom, one in the shower and one above the toilet, and both required full tiles to land on every surface of the recess, with the pattern reading correctly on the back face and the sides cut cleanly to meet it. Getting that right across two separate niches takes time at the planning stage. Rushing the setting out on a niche produces a result that looks awkward and draws the eye for the wrong reasons. The time was taken here to make sure neither did.
All external corners throughout the bathroom were finished with black tile trims, and black grout was used throughout to tie the scheme together and match the black fixtures. The choice of black grout with white metro tiles is one that divides opinion but in a barn conversion with exposed original brick and dark timber, it is the right one. It grounds the scheme in the character of the building and stops the white tiles from looking clinical in a space that has age and warmth behind it. From strip-out to finished bathroom, the whole project was completed in three weeks.
A barn conversion bathroom stripped back to its frame and rebuilt properly from the inside out.
From strip-out to finished barn bathroom

Drag the slider to compare the stripped-out first-fix wall with the finished tiled bathroom.
Project gallery

Materials selected for this project
Everything delivered as part of the brief
-
Quality Materials
European-sourced tiles, premium adhesives, and cementitious waterproofing specified for long-term performance.
-
Expert Installation
Experienced craftspeople handling prep, set-out, installation, grouting, and the final finish standard.
-
Bespoke Design Detailing
Layouts, niches, trims, and grout rhythm coordinated so the finished room feels architectural rather than pieced together.
-
Five-Year Warranty
Workmanship, waterproofing, and finish protected by a written guarantee with clear aftercare guidance.
From survey to sign-off
-
Week 1
Survey & Specification
On-site survey, material presentation, and a fixed written quote.
-
Week 2
Quote Sign Off
Quote and tile direction agreed with the client.
-
Week 3
Prep
Substrate prepared, wall waterproofing, underfloor heating installed.
-
Week 4
Tiling & Grouting
Tiles laid to level, grout tone matched, silicone finished matching the tile colour.
-
Week 5
Snagging & Handover
Deep clean, final snagging walk-through, and aftercare handover.
A considered transformation built to feel calm, durable, and beautifully resolved.
Envisioning a similar transformation?
Whether you are planning a listed-property renovation or a contemporary bathroom refit, our team can help shape the brief and the technical pathway.