Twickenham: Full Bathroom Renovation
Full strip-out and redesign of a bathroom in Twickenham to maximise space, replacing the bath with a continuous walk-in shower, wall-hung fittings throughout, underfloor heating, and two tile schemes including ocean blue gloss in herringbone
More Space from the Same Room
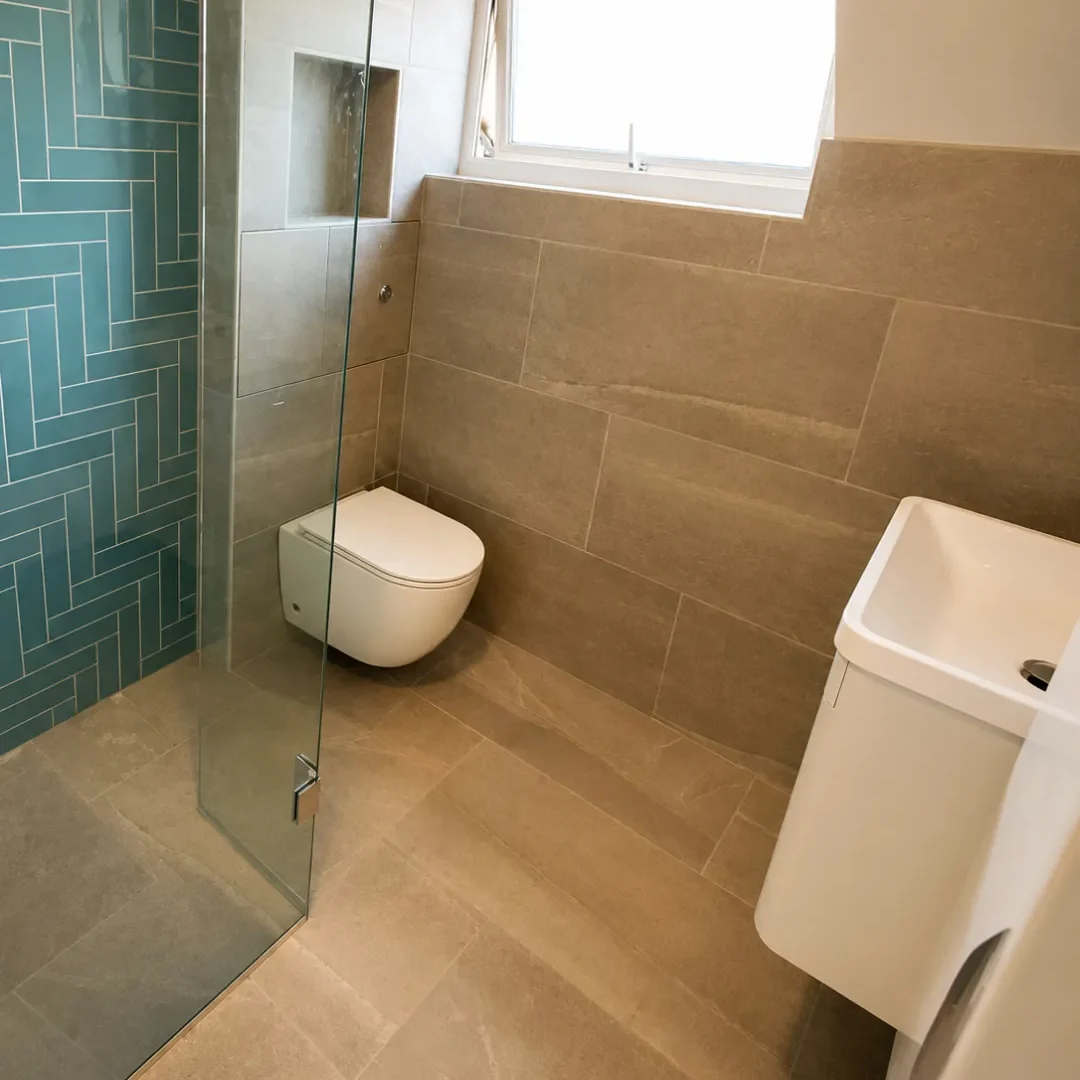
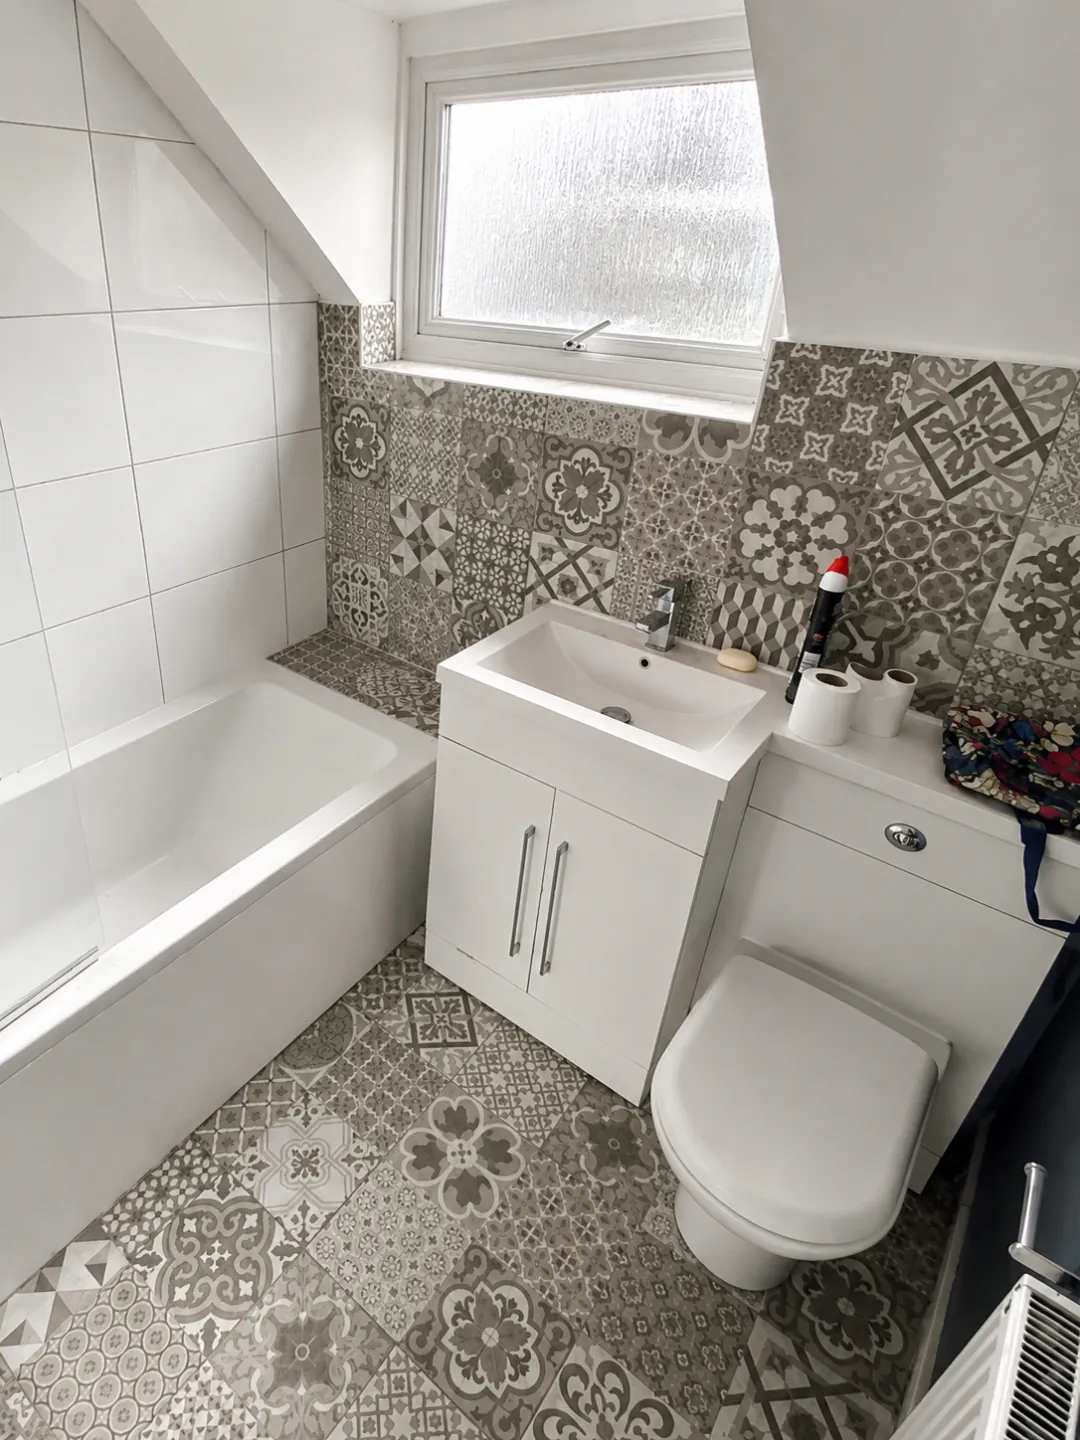
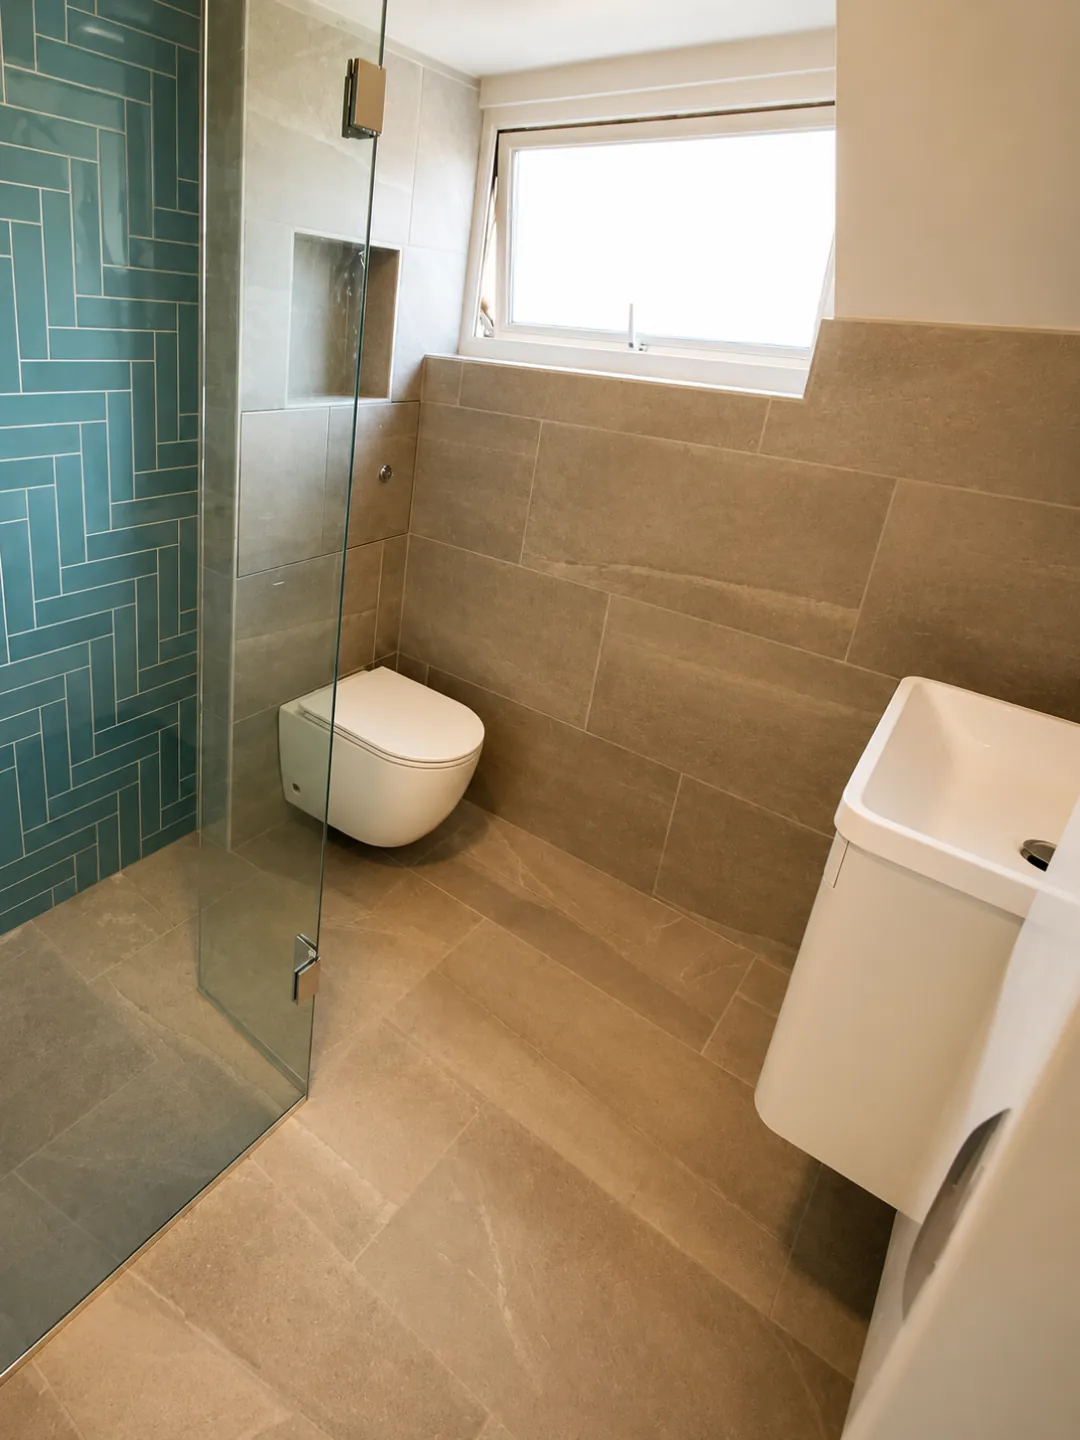
The before image shows what was there. A bath taking up the majority of the floor. A floor-mounted toilet and basin eating into the space around it. A tile scheme that dated the room. The bathroom was not small. It was just badly arranged and full of objects that were fixed to the floor when they did not need to be. The brief was to replace the bath with a walk-in shower, move the toilet and basin off the floor and onto the wall, and create a continuous tiled surface running through the whole room without any step or level change at the shower threshold.
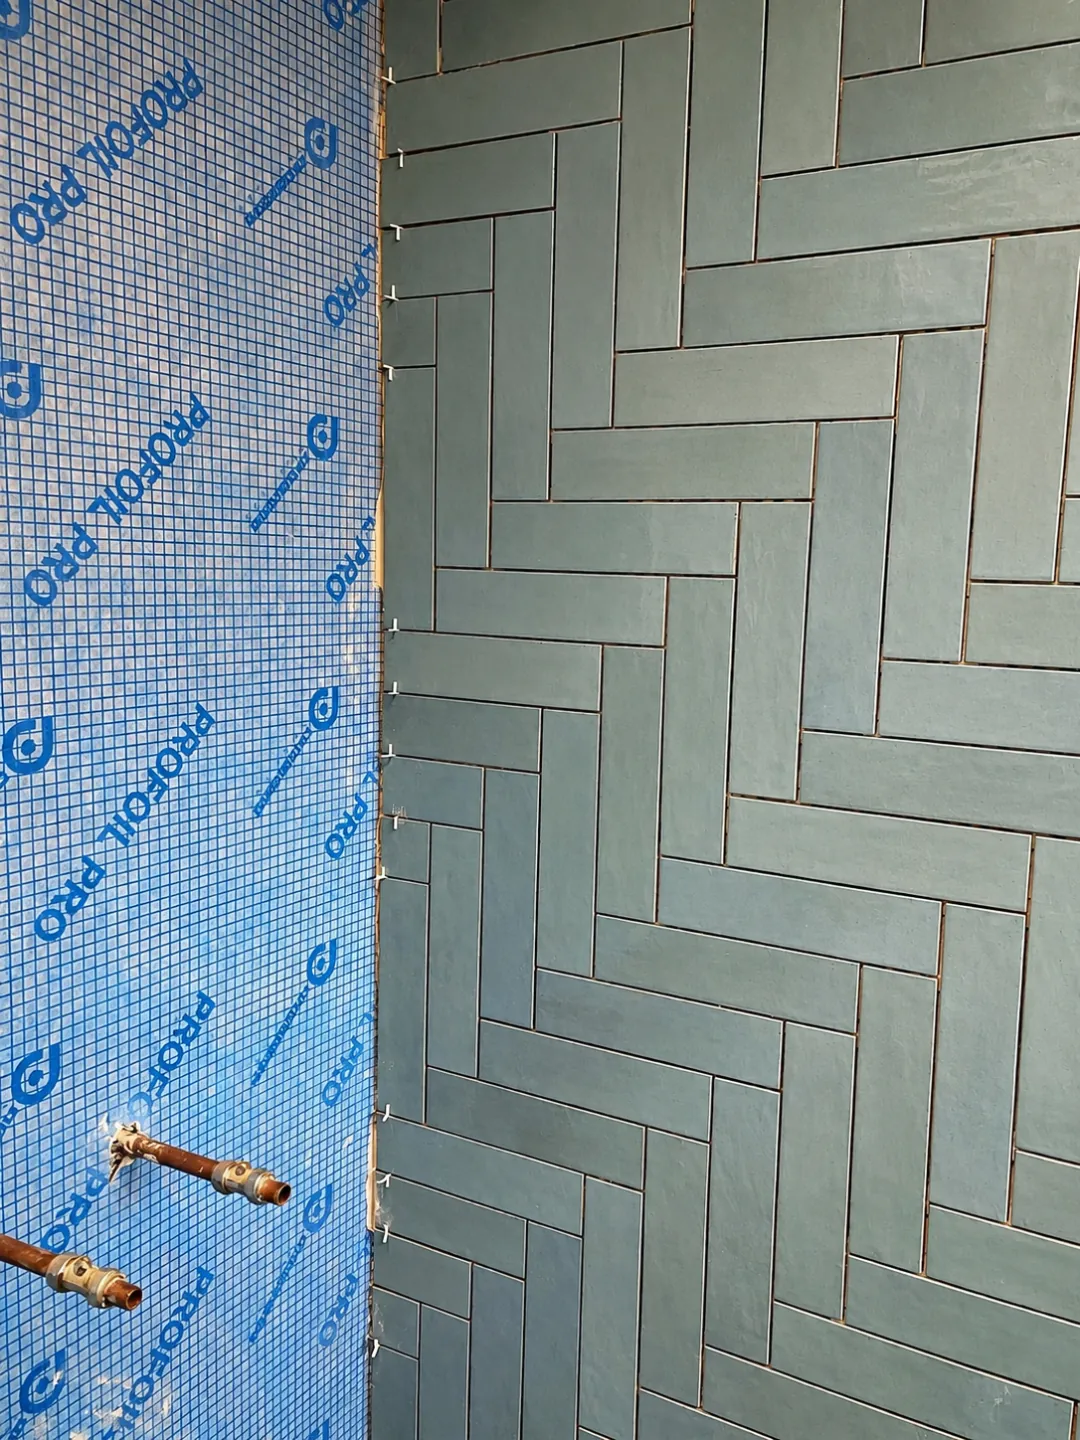
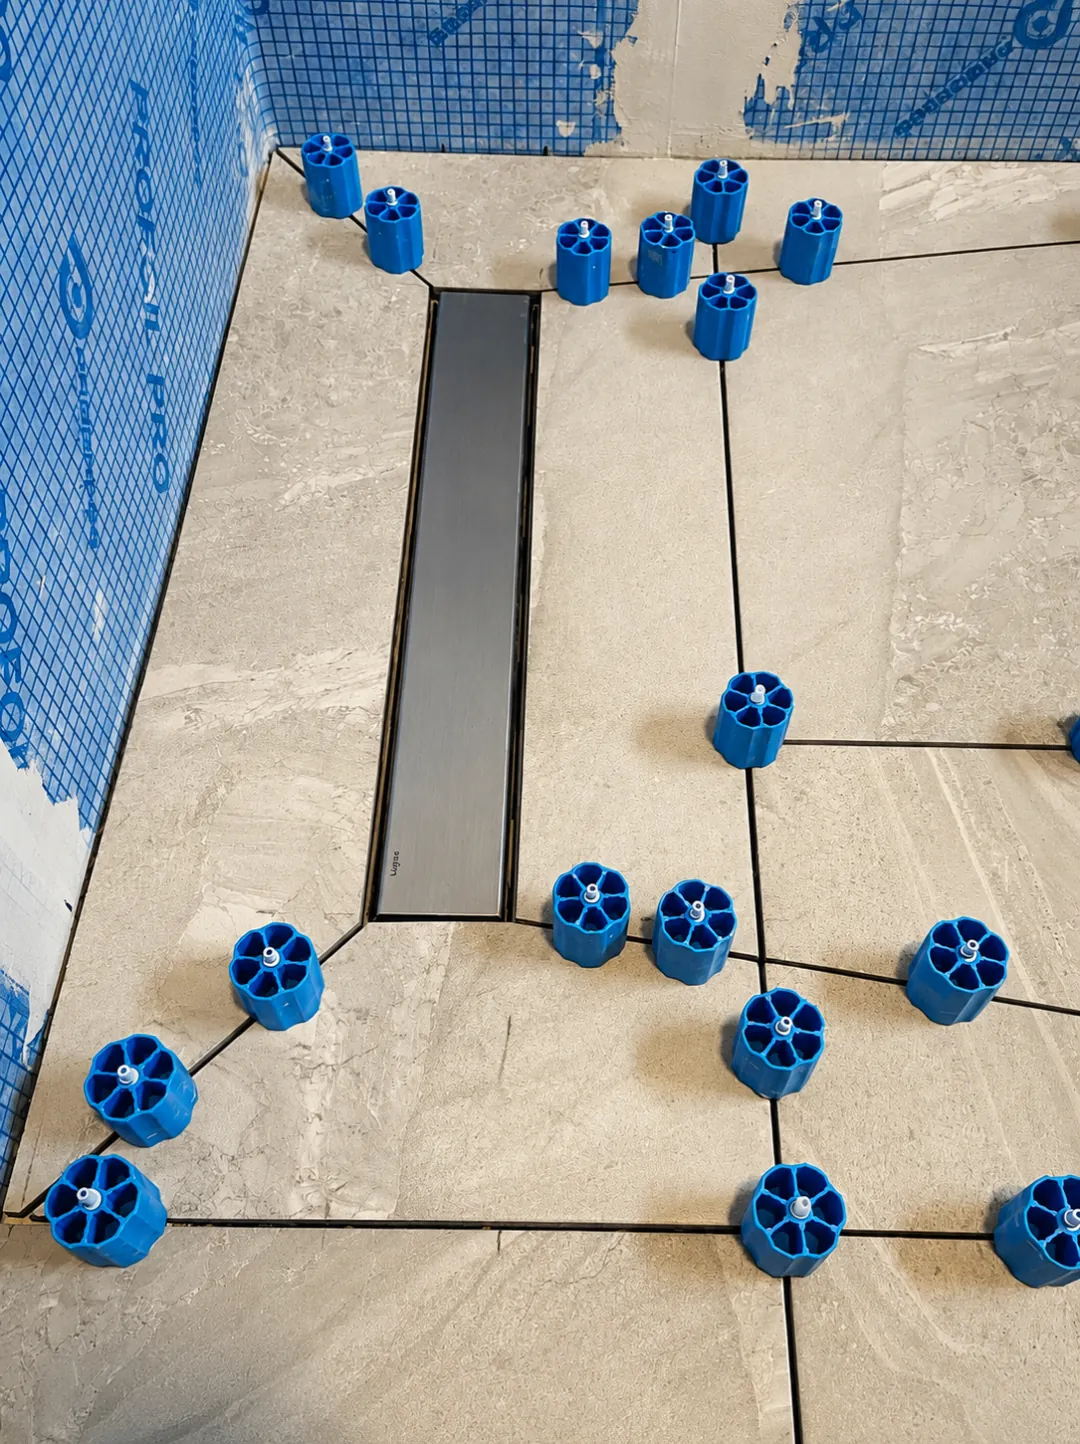
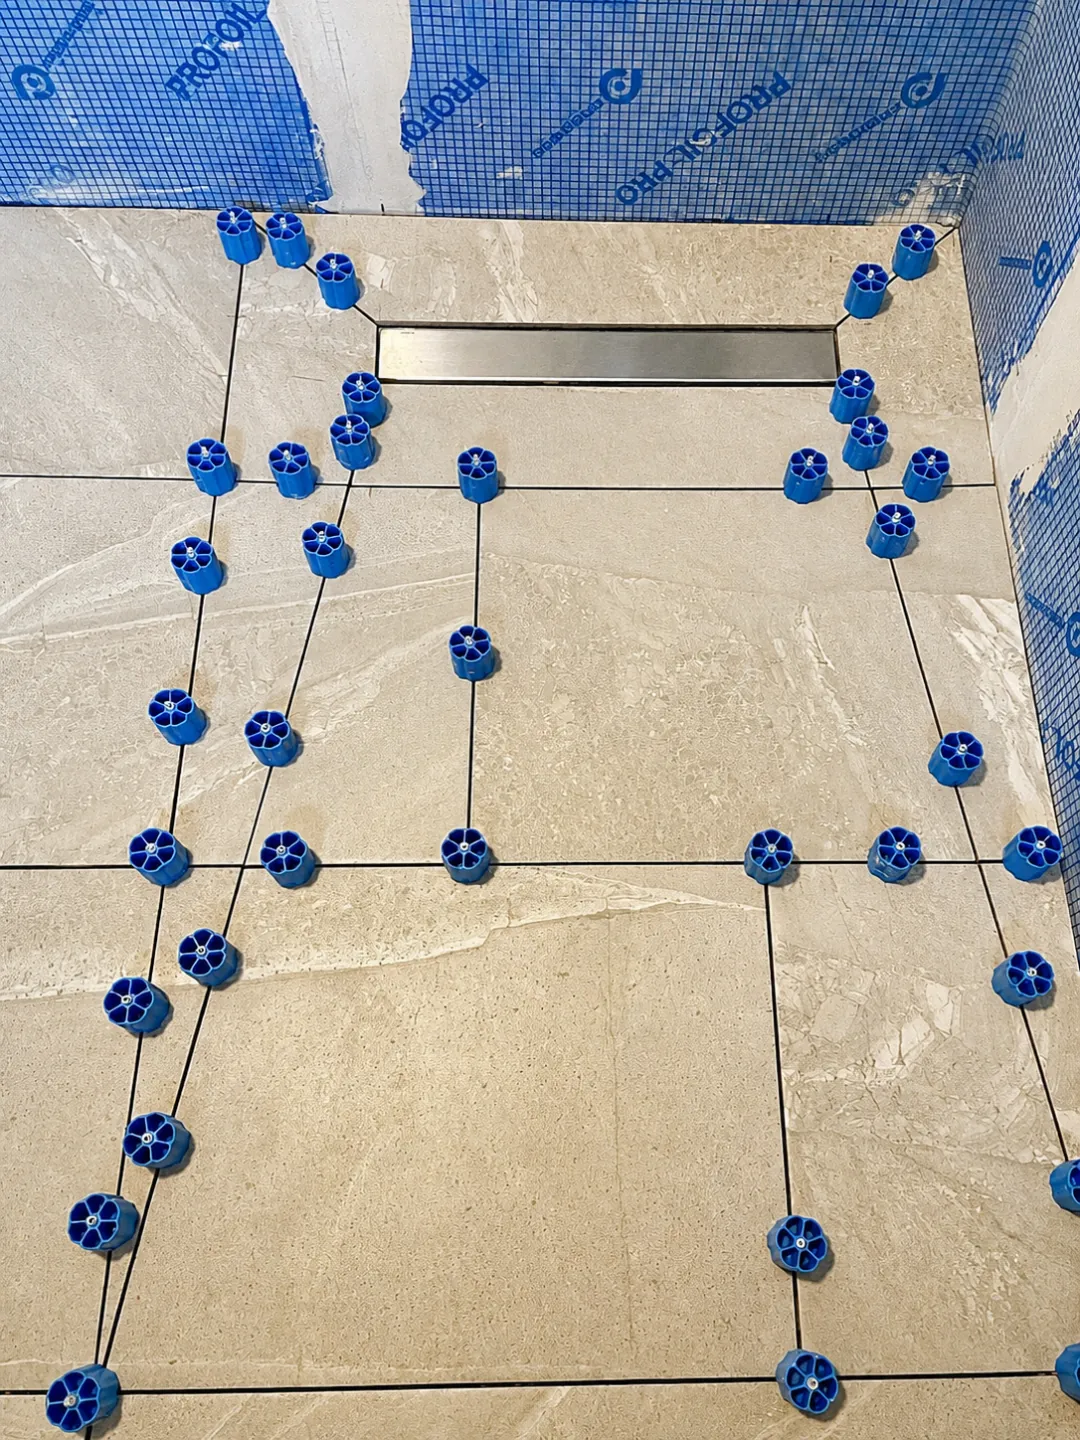
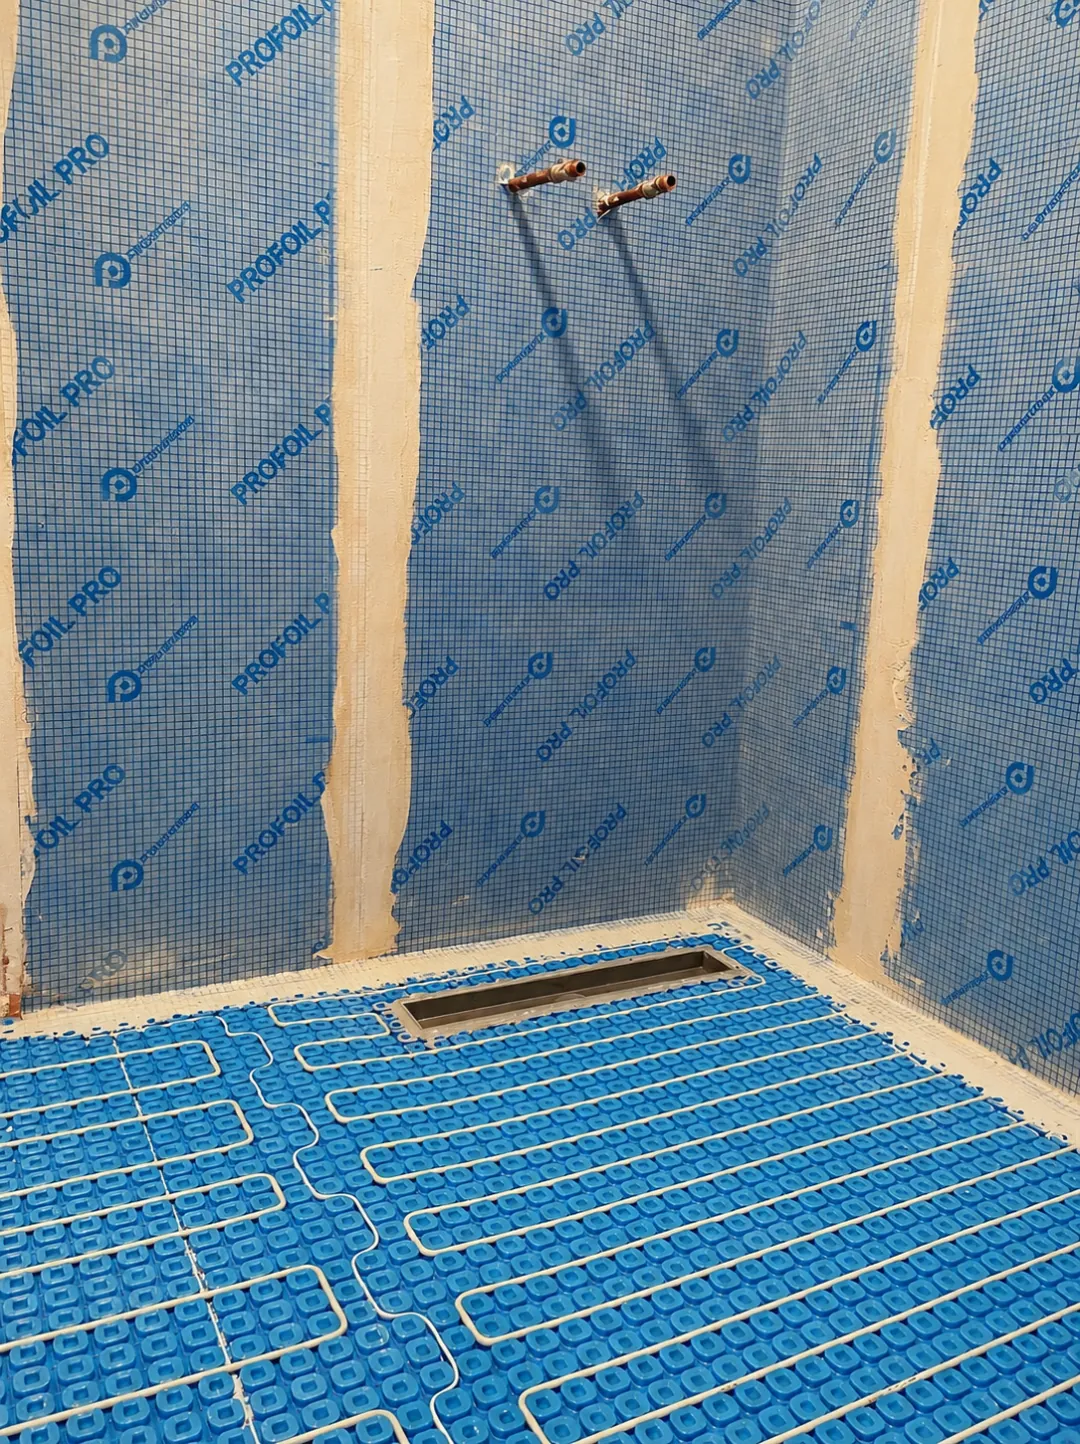
That meant stripping everything out first. A stud wall was built to house the concealed cistern for the wall-hung toilet. New plaster went on the walls first, then the waterproofing membrane was applied over it. Underfloor heating was laid across the full floor area including inside the shower zone, with the linear drain set in position before any tile went down. The process image shows the room at that stage. Everything resolved before the tiling started so nothing had to be undone later.
Two Tile Schemes, One Continuous Room
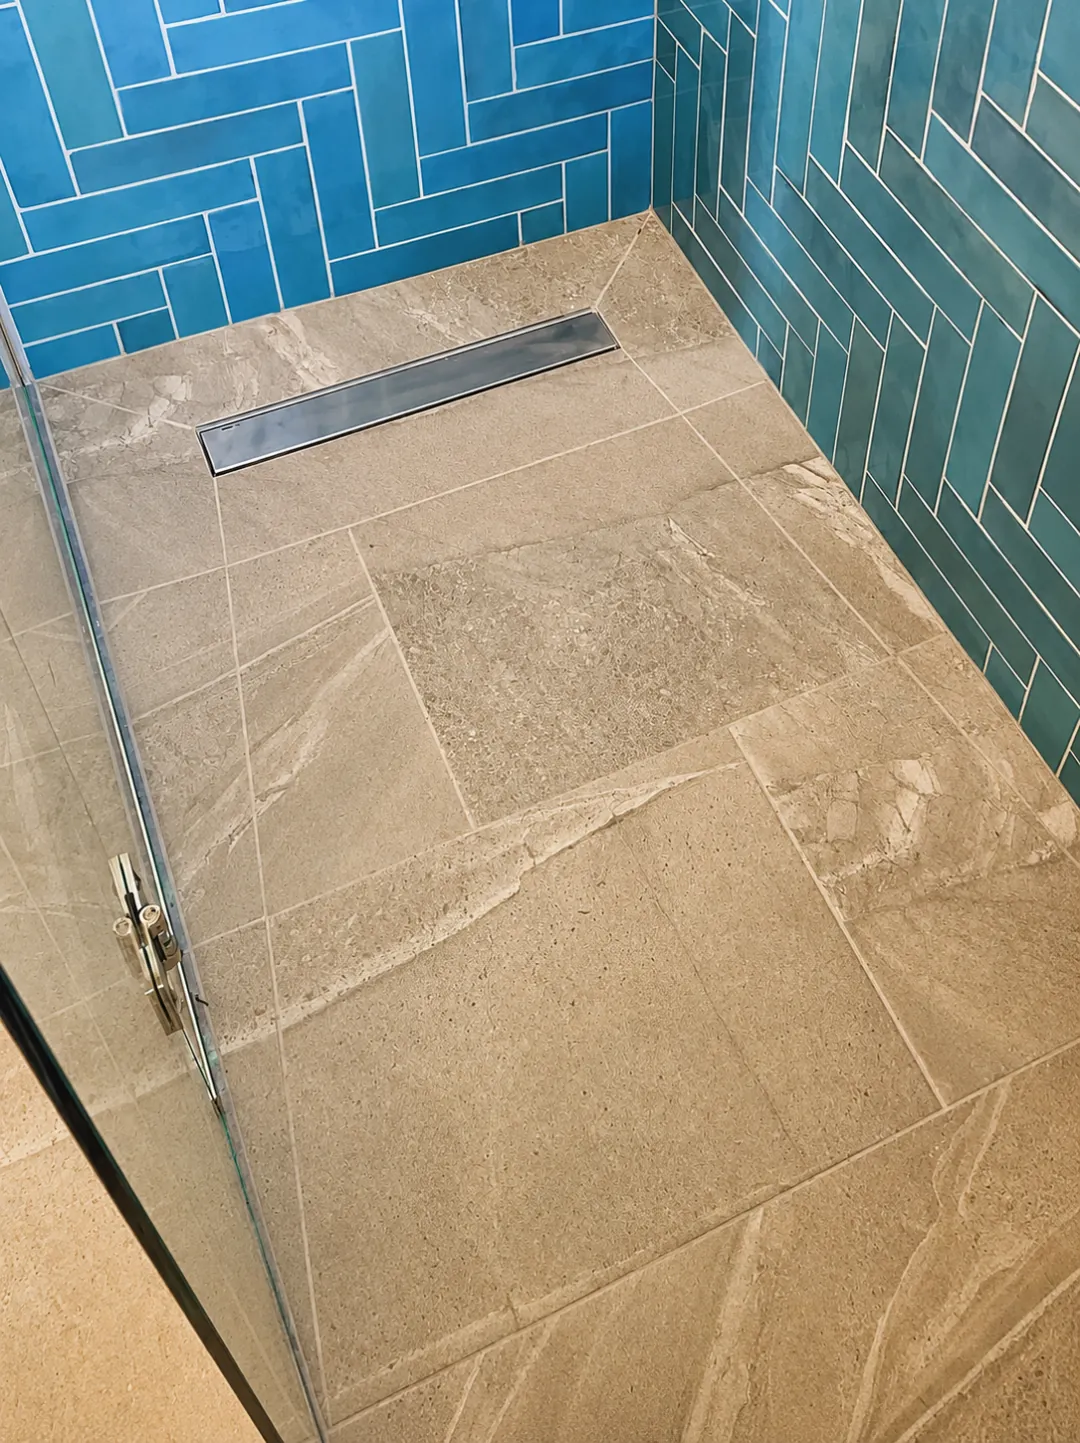
The floor is a 300 x 600mm grey stone-effect porcelain, laid continuously from the shower through to the rest of the bathroom with the linear drain flush with the surface. The shower feature wall is ocean blue gloss metro tiles at 65 x 250mm, laid in herringbone at 90 degrees. The shift between the blue herringbone in the shower and the warm grey large-format tiles on the remaining walls gives the room two distinct zones without breaking the flow. The recessed niche above the toilet was set out carefully so full tiles land on every surface inside the recess, the back face and both sides cutting cleanly where they meet. An access panel was integrated into the wall tiling for maintenance access to the pipework behind, sitting cleanly within the tile layout with no visible break.
All external corners were finished with grey tile trims matched to the wall tiles. It is a detail that is easy to skip and immediately visible when it is. Raw cut tile edges at corners let a bathroom scheme down at close inspection. The trims, the continuous floor level, the flush drain, the wall-hung fittings and the access panel all work toward the same result: a bathroom that feels larger than it is and more considered than its size might suggest. Three weeks from strip-out to finished room.
The brief was straightforward. Make the bathroom feel bigger. The way to do that was to take everything out and start again.
Before & After
Drag the slider to view the transformation.
Project gallery
Materials selected for this project
Everything delivered as part of the brief
-
Quality Materials
European-sourced tiles, premium adhesives, and cementitious waterproofing specified for long-term performance.
-
Expert Installation
Experienced craftspeople handling prep, set-out, installation, grouting, and the final finish standard.
-
Bespoke Design Detailing
Layouts, niches, trims, and grout rhythm coordinated so the finished room feels architectural rather than pieced together.
-
Five-Year Warranty
Workmanship, waterproofing, and finish protected by a written guarantee with clear aftercare guidance.
From survey to sign-off
-
Week 1
Survey & Specification
On-site survey, material presentation, and a fixed written quote.
-
Week 2
Quote Sign Off
Drawings, quote and tile direction agreed with the client.
-
Week 3
Strip & Prep
Protection down, old surface removed, substrate prepared, waterproofing applied, underfloor heating installed.
-
Week 4
Tiling & Grouting
Tiles laid to level, grout tone matched, silicone finished matching the tile colours.
-
Week 5
Snagging & Handover
Deep clean, final snagging walk-through, and aftercare handover.
A considered transformation built to feel calm, durable, and beautifully resolved.
Envisioning a similar transformation?
Whether you are planning a listed-property renovation or a contemporary bathroom refit, our team can help shape the brief and the technical pathway.