A Victorian Front Path Rebuilt
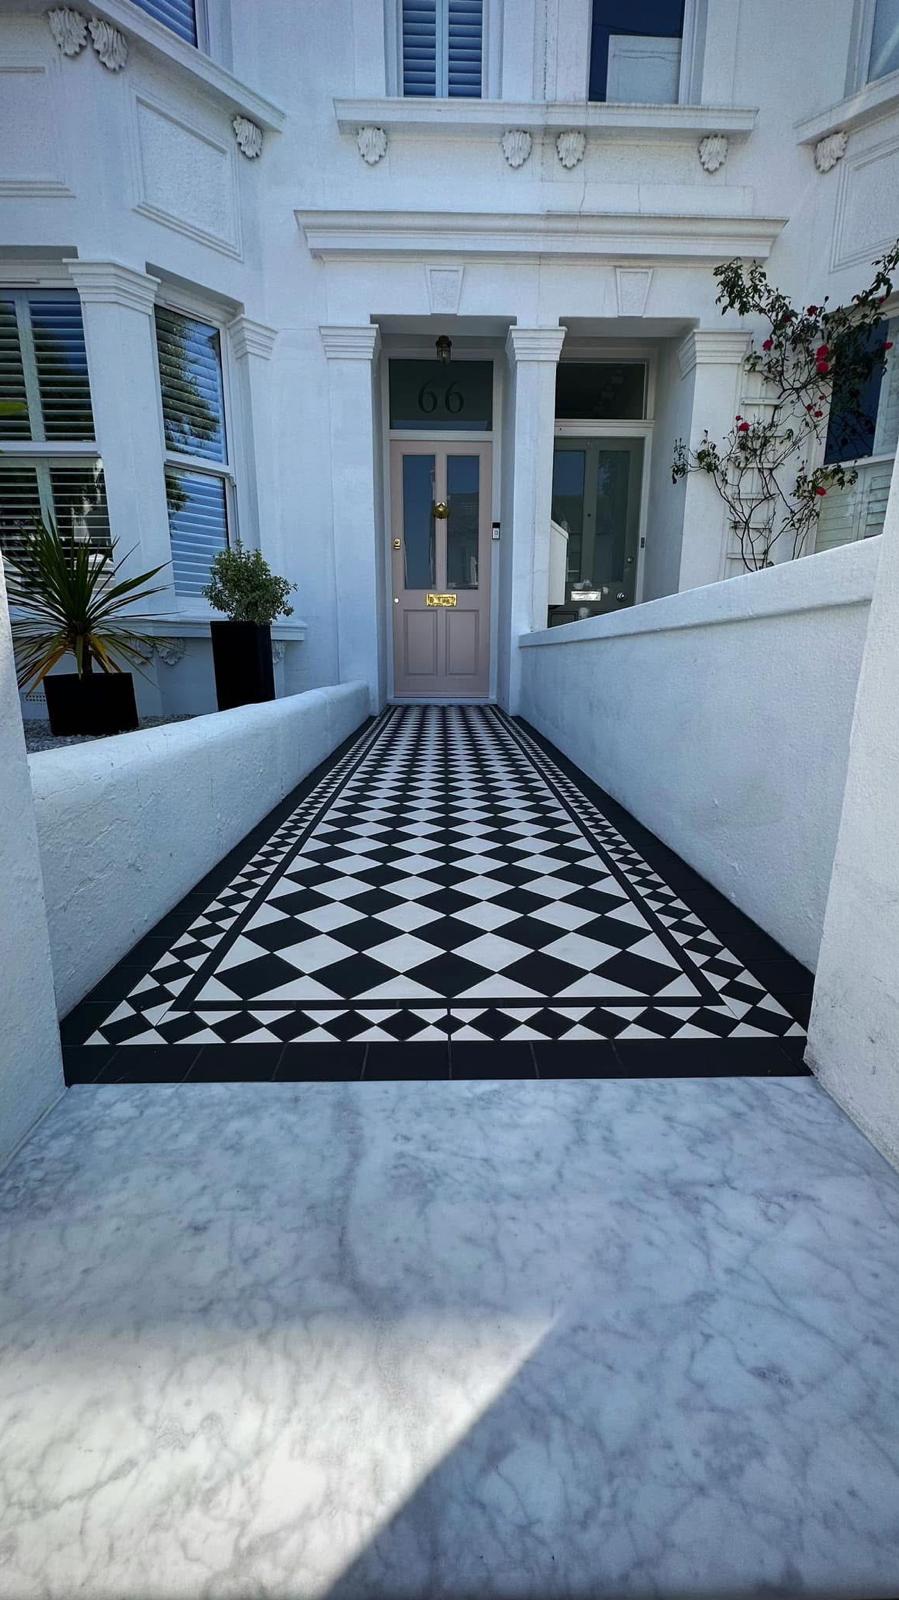
Original Victorian-style tiles in black and white, new concrete slab and Carrara marble threshold a full rebuild for a Victorian property in Greater London
A Failed Slab, a Fresh Start and a Pattern That Had to Be Perfect
This project is in the same neighbourhood as our first Victorian front path project and the brief was the same. The before image says everything you need to know about the starting point. The existing concrete had cracked across its full width, weeds were pushing through at the edges and the surface looked nothing like what the house deserved. A path like that does not get better with time. The slab came out entirely before any tiling work began. A new concrete base was cast and an anti-fracture membrane was installed across it to give every individual tile a stable, movement-resistant foundation built to hold for years.
The second challenge was the pattern. The classic black and white diamond arrangement with a clean border running the full length on both sides sounds simple. Getting it right is not. The border and the central diamond need to work together as a single planned composition before a tile goes down. If the setting out is off, the geometry drifts as the path approaches the door and the whole thing reads as wrong even if you cannot immediately say why. On a Victorian terrace where these paths are seen every day by everyone who walks past, that matters.
Plan the Whole Path Before Laying the First Tile
The setting out was resolved fully before any tile touched the ground. The geometry was planned as one composition from gate to front door so the border and the diamond pattern would work together cleanly for the full length of the path. Every individual tile was then placed with that finished picture in mind. The Carrara marble slab at the entrance gives the path a proper starting point, a clean transition between the pavement and the tiled surface. It was the right call on the first path in this street and it works just as well here.
The path was sealed on completion. The result is a front path that looks right for the house, right for the street and built to last. Two paths in the same neighbourhood, both done to the same standard. That is not a coincidence. It is how we work.
The same street. The same standard. A cracked concrete path replaced with the front path the house should always have had.
Project gallery

Materials selected for this project
What was included
-
Full base replacement
Existing failed concrete removed and replaced with a new stable base.
-
Movement protection
Anti-fracture or reinforced protection installed beneath the tiled surface.
-
Patterned tile installation
Geometric tile layout set out carefully from entrance to front door.
-
Threshold detailing
Entrance edges and thresholds finished with considered architectural detail.
Project timeline
-
Week 1
Survey & Specification
On-site survey, material selection, and a fixed written quote.
-
Week 2
Design Sign off
Drawings and tile direction agreed with the client.
-
Week 3
Strip and Prep
Old surface removed and substrate prepared
-
Week 4
Tiling & Grouting & Sealing
Tiles laid to level, grout tone matched, deep clean and sealing.
-
Week 6
Snagging & Handover
Final snagging walk-through, and aftercare handover.
A period entrance with a properly rebuilt base.
Ready to discuss a similar project?
The finished path pairs a traditional black and white Victorian pattern with a new reinforced substrate and Carrara marble threshold.